Päiväkirja
Aurora Photography Lapland: A Local's Guide to Epic Shots
We're sharing our tried-and-true secrets for capturing breathtaking photos of the Northern Lights right here in Lapland, from camera settings to the best apps.
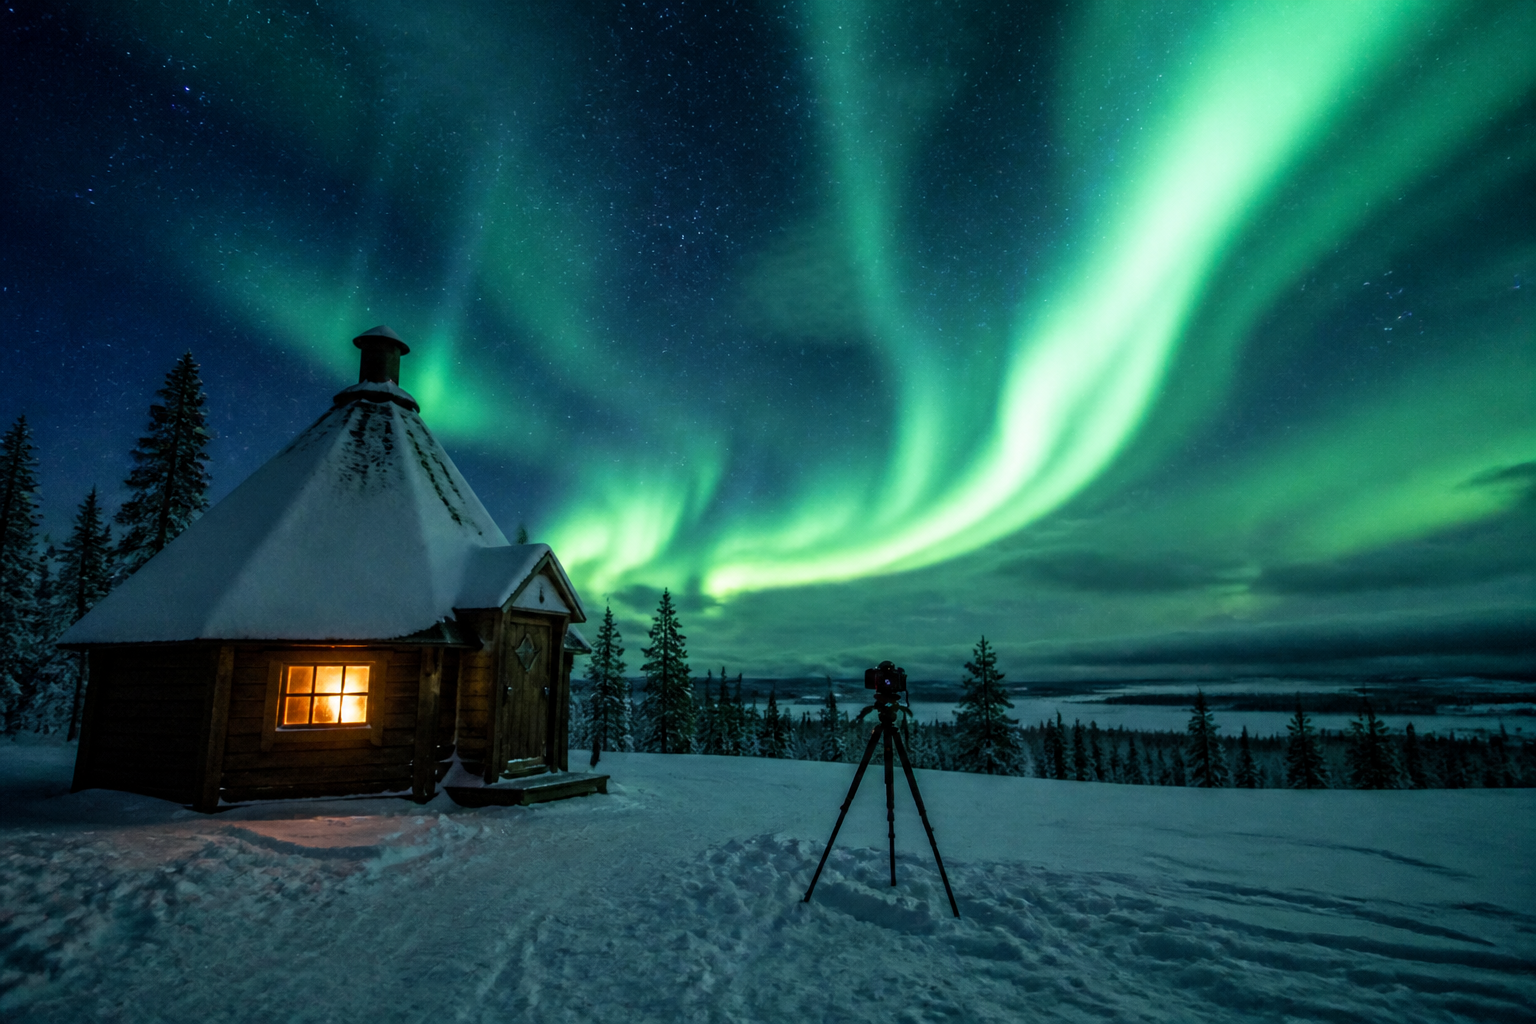
Seeing the Northern Lights dance across the Lapland sky is a memory that stays with you forever. That feeling of standing under a silent, frozen sky as curtains of green, pink, and purple light swirl overhead is pure magic. What's not so magical? Getting back to your warm cabin, giddy with excitement, only to find your photos are just blurry green smudges on a black screen.
We’ve been there. We’ve fumbled with frozen fingers, cursed at blurry shots, and learned the hard way so you don’t have to. Capturing a great photo of the Aurora Borealis isn't about having the most expensive gear; it's about preparation, a little bit of patience, and a few local secrets. We're here to share everything we know to help you take home a photo that does justice to the incredible spectacle you witnessed.
The Gear You Actually Need (and What You Don't)
First things first, let's talk gear. You might think you need a professional kit worth thousands of euros, but that’s not the case. You just need the right gear.
- Camera: A DSLR or mirrorless camera with manual mode is your best friend. This is crucial because you need to control the settings yourself. Brands don't matter as much as the manual capability.
- Lens: A wide-angle lens (something between 14mm and 24mm) is ideal for capturing the vastness of the sky. More importantly, you need a "fast" lens, which means it has a wide aperture (a low f-number, like f/1.8, f/2.8, or f/4). This lets in as much light as possible.
- Tripod: This is the single most important piece of equipment. It is absolutely non-negotiable. You’ll be using long shutter speeds, and any tiny movement will turn your photo into a blurry mess. Get a sturdy tripod that won't wobble in the Lapland wind. Don't cheap out on this!
- Essential Extras: Bring at least two spare batteries. The cold drains them incredibly fast. Keep the spares in an inside pocket of your jacket, close to your body heat. A headlamp with a red-light mode is also a lifesaver—it lets you see your camera settings without ruining your night vision (or the photos of others around you).
Mastering Manual Mode: The Magic Settings
Auto mode will fail you here. It's time to embrace manual ('M' on your camera dial). It sounds intimidating, but it's really just three key settings. Here's our go-to starting point.
- Focus: Switch your lens from autofocus (AF) to manual focus (MF). Now, turn the focus ring to the infinity symbol (∞). Here's the critical local tip: Infinity on most lenses isn't perfectly sharp. Use your camera's live view, digitally zoom in on the brightest, most distant star or light you can find, and then manually adjust the focus ring just a tiny bit back from infinity until that star is a sharp pinprick of light. Your photos will be infinitely better for it.
- Aperture: Set your aperture to its widest setting (the lowest f-number your lens can do, e.g., f/1.8 or f/2.8). This opens the lens up to let in the maximum amount of light.
- Shutter Speed: This is your main variable for the night. A good starting point is 10-15 seconds. If the aurora is faint and slow-moving, you can increase this to 20 or even 25 seconds to gather more light. If the lights are dancing very quickly, shorten your shutter speed to 3-8 seconds. A shorter exposure will freeze the motion and capture the crisp details of the curtains.
- ISO: The ISO controls your camera's sensitivity to light. Start at ISO 1600. After taking a test shot, check your screen. Too dark? Push the ISO up to 3200. Still too dark? Maybe 6400 on a modern camera. The trade-off is that higher ISOs create more digital "noise" or grain. It's a balance between brightness and cleanliness.
Pro Tip: Always use your camera's 2-second self-timer or a remote shutter release. Even pressing the shutter button can cause enough vibration to blur a long exposure.
Smartphone Aurora Photography: Yes, It's Possible!
Don't have a big camera? Don't worry! Modern smartphones are surprisingly capable. We've seen some amazing shots taken on iPhones and Androids. The principles are the same.
First, you still need a tripod. A small, portable phone tripod with a mount is inexpensive (around €20-€30) and essential. Second, use your phone's 'Night Mode'. It's designed for exactly this kind of situation, automatically taking a longer exposure.
For more control, download a third-party camera app that allows you to manually set shutter speed and ISO. Apps like "ProCam X" (Android) or "Halide" (iPhone) can give you DSLR-like control. Set a long shutter speed (5-15 seconds), keep the ISO as low as you can, and use the self-timer. You'll be amazed at what your phone can do.
When and Where to Go: Timing is Everything
The aurora is a natural phenomenon, so there are no guarantees, but you can dramatically increase your chances by being smart about timing and location.
- Season: The official aurora season in Lapland runs from late August to early April. We find the best periods are often September-October and February-March. This is due to the Earth's orientation to the sun (the equinox effect), which often leads to stronger geomagnetic activity, and the weather tends to offer more cloud-free nights than in the middle of winter. If you're wondering about the Best Time to See Northern Lights in Lapland, check out our detailed guide.
- Time of Night: While the lights can appear anytime it's dark, the most common window for strong displays is between 10 PM and 2 AM. Patience is key. We often head out, set up our gear, and wait with a warm flask of berry juice.
- Location: Light pollution is your enemy. You need to get away from the lights of towns and ski resorts. Even a 10-minute drive out of Rovaniemi into the forest makes a massive difference. The vast, dark landscapes around Inari-Saariselkä or the fells near Levi and Ylläs are legendary for a reason. A frozen lake or an open bog in Pyhä-Luosto National Park provides an unobstructed view of the northern horizon. Consider exploring hotel availability in Lapland for your base.
Our Favorite Apps for Chasing the Lights
You don't need to guess when the aurora will show up. We use a few key apps to plan our nights.
- My Aurora Forecast & Alerts: This is the best all-around app for beginners and experts alike. It gives you a simple KP index (a scale of 1-9 for geomagnetic activity), cloud cover maps, and, most importantly, push notifications when the aurora is likely to be visible from your location.
- SpaceWeatherLive: For the data nerds among us. This app provides more detailed information on solar wind speed, density, and the crucial Bz value (when it's negative and low, things get exciting). It's more complex but gives you a deeper understanding of what's happening.
- Local Facebook Groups: This is our secret weapon. Search on Facebook for groups like "Aurora Alert Rovaniemi" or similar for other towns. These are filled with local enthusiasts and guides who post real-time sightings. An alert from a person 20km east of you saying "It's kicking off!" is the most reliable forecast you can get. For more detailed aurora and space weather information, you can also check the Finnish Meteorological Institute website.
Composition: Making Your Photo Tell a Story
A great aurora photo is more than just a picture of the sky. To elevate your shot, think about composition.
- Find a Foreground: Include something in the foreground to give your photo a sense of scale and place. A snow-laden pine tree, a traditional wooden laavu shelter, a winding road, or the reflection in a frozen (but clear of snow) lake can transform a good shot into a spectacular one.
- Include People: Want a truly memorable photo? Put yourself or a friend in the shot! Just remember they have to stand absolutely still for the entire duration of the exposure (e.g., 10 seconds). It's harder than it sounds but worth it.
- Vary Your Orientation: Don't just shoot in landscape. If the aurora is shooting straight up in tall pillars, turn your camera vertically to capture the full height and drama.
Dressing for Success (and Survival)
This might be the most practical tip we can give. You can't take good photos if you're shivering so hard you can't press the buttons or you have to quit after 20 minutes. Temperatures in Lapland regularly drop to -20°C or -30°C.
Dress in layers:
- Base Layer: Merino wool. It wicks moisture and stays warm even if you sweat.
- Mid Layer: A thick fleece or a light down jacket.
- Outer Layer: A well-insulated, windproof, and waterproof parka and ski pants.
- Extremities: This is where the cold gets you. You need insulated, waterproof boots (go one size up to fit thick wool socks), a warm hat that covers your ears, a neck gaiter or balaclava, and good gloves. We recommend a pair of thin liner gloves for operating the camera, worn under a pair of thick, heavy-duty mittens.
Don't forget chemical hand warmers (a pack of 10 costs about €15). Put them in your mittens and boots. They are a game-changer. For a comprehensive guide on what to wear in cold climates, check out our article on What to Wear in Lapland Winter. If you're looking for Lapland activities and tours that include aurora hunting, consider booking one where warm clothing is often provided.
Frequently Asked Questions
Book your Lapland trip
- 🏨 Stay — Compare hotels, cabins and glass igloos in Lapland
- 🦌 Do — Browse husky, reindeer and aurora tours
Some links on this page are affiliate links. Booking through them costs you nothing extra and helps keep Lapland Buddy free.
Usein kysyttyä
What is the best month for aurora photography in Lapland?
While the entire season from September to early April offers chances, we find the periods around the equinoxes—September-October and February-March—are often best. They tend to have higher geomagnetic activity and more cloud-free nights than the deep winter months.
Can I take good photos of the Northern Lights with my iPhone?
Yes, absolutely, especially with newer models. The key is to use Night Mode, a small tripod to keep it steady, and the self-timer to avoid shake. While it may not match a DSLR for quality, you can get surprisingly beautiful results.
What is the absolute minimum camera gear I need?
The three non-negotiable items are: 1) A camera with manual controls (DSLR, mirrorless, or even a capable phone). 2) The fastest, widest lens you have (e.g., f/2.8 aperture or lower). 3) A sturdy tripod. You cannot take a sharp aurora photo without a tripod.
Do I need to book a guided tour for aurora photography?
It's not essential if you have a rental car and are comfortable using our tips. However, a guided tour (typically €90-€150 per person) can be fantastic. Guides know the darkest spots, monitor weather and solar activity, and can provide hands-on help with your camera settings.
How do I keep my camera batteries from dying in the extreme cold?
Cold is the enemy of batteries. Always start with a full charge and bring at least one, preferably two, fully charged spares. Keep the spare batteries in an inside pocket of your jacket, close to your body, to keep them warm until you need to swap them out.
Is the KP index the only thing that matters for seeing auroras?
No, it's just one piece of the puzzle. A high KP index is a good indicator, but we've seen amazing shows on a KP 2 night and nothing on a KP 5 night. More important factors are clear skies, being in a dark location, and a favorable 'Bz' component of the solar wind (a southward direction). Don't get too hung up on the KP number alone!
Lisää kysymyksiä?
Kysy Buddylta suoraan — ilmaisia ja välittömiä vastauksia Rovaniemestä ja Lapista.
Avaa Lapland Buddy